Mini cherry pies5 (3)
Soft dough, cherry sweet, mini pies – perfect treat!
MINI CHERRY PIES
Difficulty: Medium10
pies45
minutes50
minutes30
minutes2
hours5
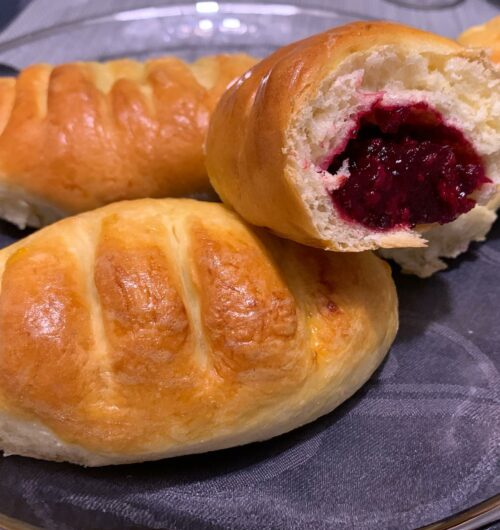
minutesThere’s something incredibly satisfying about a perfectly baked pie, especially when it’s filled with juicy, sweet cherries. These small cherry pies are made with a super soft and tasty dough that perfectly complements the tartness of the cherries. Whether you’re looking for a delicious dessert to serve at a dinner party or a sweet treat to enjoy with your morning coffee, these pies are sure to hit the spot.
Let’s get started!
Ingredients
- DOUGH:
Milk 70 ml
Butter 50 grams
Water 70 ml
Fresh yeast 15 grams
Eggs 1 pcs.
Sugar 25 grams
Salt 1/4 tsp
Wheat flour 330 grams
- FILLING:
Frozen pitted cherries (or strawberries) 350 grams
Sugar 110 grams
Corn starch 27 grams (or half amount if you use potato starch)
Water 40 ml.
- ADDITIONALLY:
Egg yolk 1 pcs.
Milk 2 tbsp.
Directions
- Cherry Filling
- For the cherry filling, combine the frozen cherries in a saucepan with the sugar and place on the stove. Bring to the boil and simmer for 10 minutes.
- Dilute the starch with a little cold water and add this mixture to the saucepan while stirring continuously. Cook for about 5 minutes until thickened and remove from the heat.
- Leave to cool completely.
- Dough
- Prepare the dough. Pour the milk into a bucket and add the butter cut into small pieces.
- Bring the milk and butter to the fire until the butter has melted. Set it aside and let it cool down to about 45-50 degrees. If you pour the mixture into a wide bowl, it will cool faster.
- In a separate bowl dissolve the yeast in warm water.
- Add the sugar, egg and salt, mix with a whisk until smooth.
- Add the milk and butter mixture which has cooled and stir again.
- Add 3/4 of the flour mixture and mix until smooth. It will be a little sticky to your hands – no worries, just grease your hands with vegetable oil at the end of working with the dough.
- Cover the dough in clingfilm and leave to rise in a warm place. It only took me about 30 minutes, but it could take an hour or more, depending on the circumstances.
- Rolling and filling dough
- Once the dough has risen, knead it and divide it into 9-10 parts. Round off each piece.
- Roll out each ball into a rectangle. Make incisions in 1/3 of the rectangle. Place filling on opposite end (the more – the better!) and roll up the dough piece.

- Place the buns on a lined baking tray and allow to proof at room temperature. Depending on the room temperature, this may take 20 to 40 minutes. During this time the buns should have doubled in volume.

- When the buns have proofed, brush them with a mixture of egg yolk and milk and put them into a preheated oven at 190 degrees. Bake until tender and crusty, about 25 minutes.
- Serve warm or completely cooled.
Tips & Tricks
- Use gloves when working with the dough if you do not like when it sticks to your fingers.